
Building Bellow
#PaperEngineering

I’ve been thinking about pneumatic power paper models. I’ve got a few ideas of projects to try in the near future to add to the existing Air Horse and various whistling pipe based projects. There are a couple of ways to go with pneumatic models, either lung power, ie blowing down a tube to power the project or some sort of pump. I’m thinking that bellows will probably be the pump at the centre of this project set.
Designing bellows of a particular size is fairly straightforward if a little repetitive. I’ve chosen to create the net for the bellows on the computer although it can also be done with a pencil and ruler.
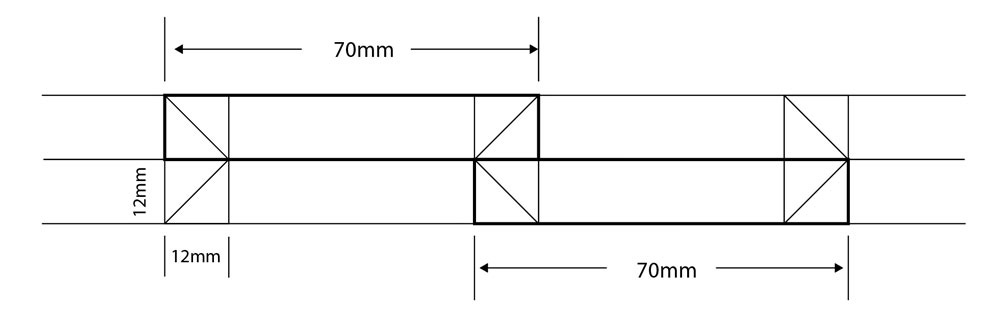
I’m designing a bellows to fit in a 70mm x 70mm space with each of the pleats in the bellows being 12mm deep. I’ve made this from a series of 70x12mm rectangles overlapping by 12mm. I then add diagonal zig-zags inside the squares.
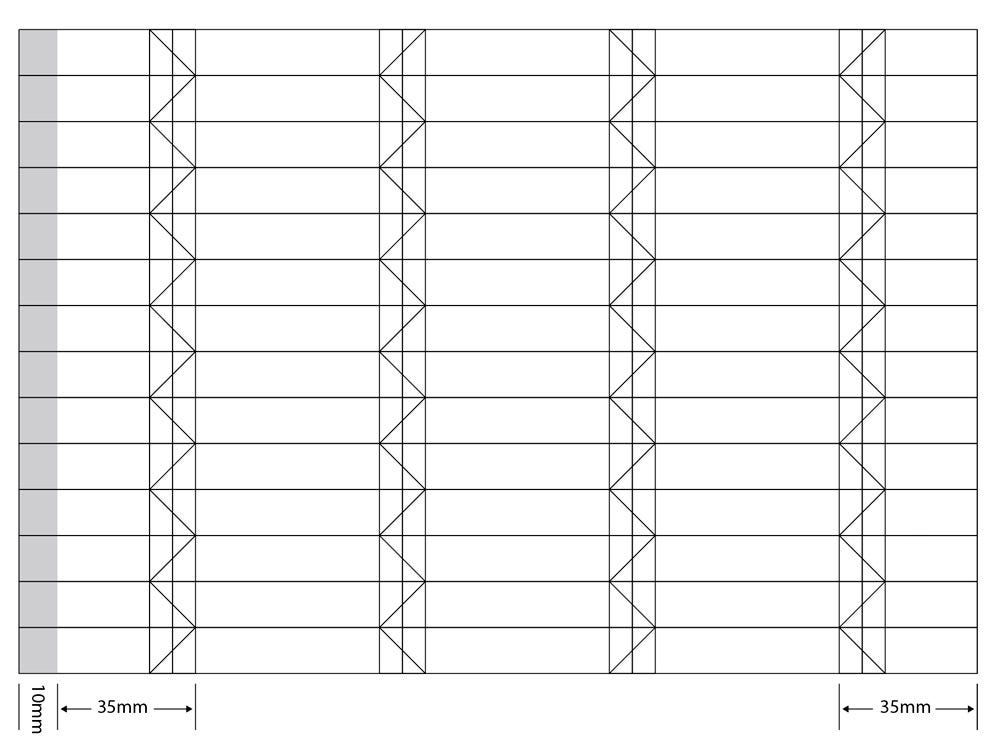
I’ve made three column of 70x12mm rectangles with two end column of 35x12mm, one with an additional 10mm overlap for glue. Each double row represents one pleat in the bellows. I’ve gone with seven for this project. This net works fine as a completed layout. Add some tabs to and bottom, print it out and fold up to make bellows.
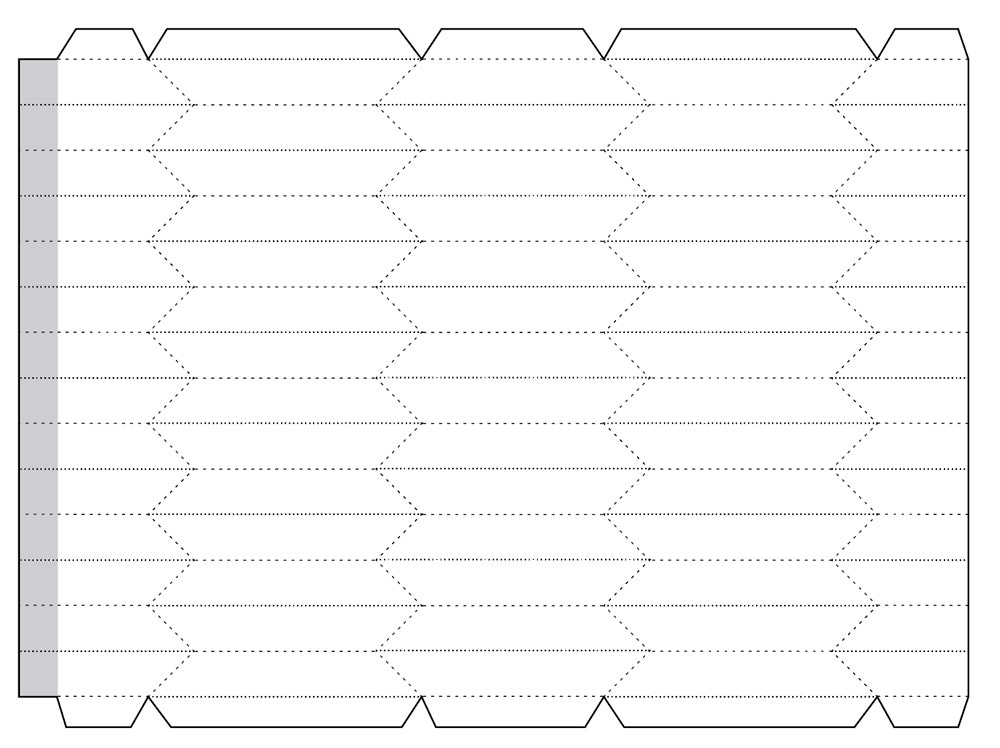
For extra clarity though, I’ve added dotted and dashed lines for the crease lines and got rid of the construction lines. Dotted lines represent valley folds, dashed lines are hill folds. If you are a premium subscriber this net is available for you to download at the end of this page. Thanks for your support!
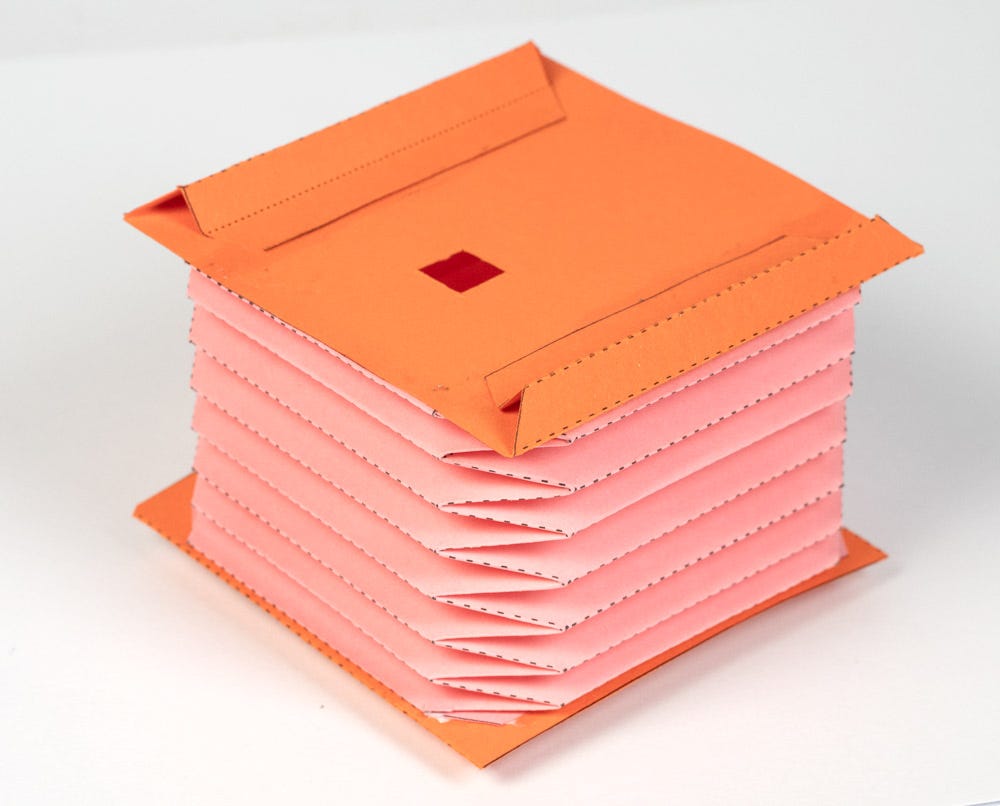
Having completed the design of the bellows I’ve printed it out onto coloured copier paper - this is 80gsm which seems to work well. What follows are the instruction for folding up the bellows. It can be tricky at first but it is easy once you get the knack! I’ve posted a video on my Instagram channel here showing the folding process.
Start off by scoring along all the dotted and dashed lines and cutting out the net.
Pre-crease the fold lines back and forth before you start. This makes it easier one you start folding up the bellows.
Roll around bellows and glue to make a tube. Try to get the lines accurately aligned. A card tube us useful to work against for this step

Fold the tabs at the end of the tube according to the line type. Dotted for valley folds, dashed for hill folds.

Start at one end, fold the lines one layer at a time.
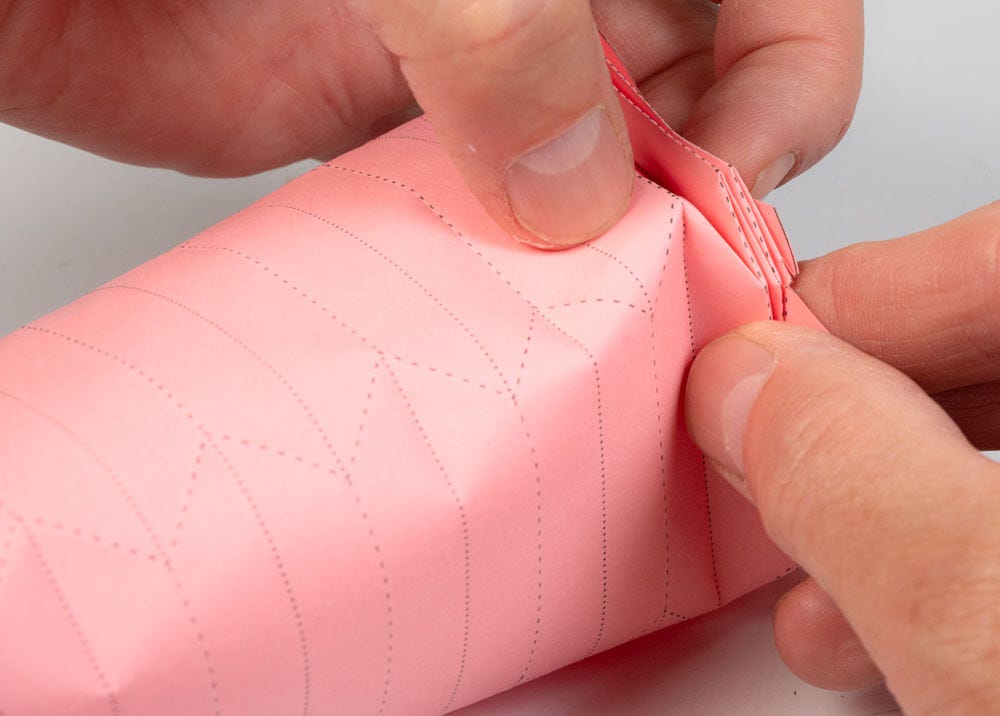
Work your way down the tube folding each layer as you go.

Fold the tabs at the other end to complete the bellows.

Having completed the bellows it is time to get them to do something. In the next newsletter I will describe how to design and make a whistling pipe from card to add to the project like the one below. If you can’t wait, the full instructions including the whistle are available to download below for premium subscribers or here on my website.

The instructions come as a downloadable pdf with parts for the pipes and for a whistle ready for you to print out and make.

Thanks very much for reading. I hope you have enjoyed this slightly different format of newsletter with extra info and images!