
Goat Linkage Mechanism
#CardboardMechanism

The goat linkage mechanism from the previous post began life as a simple prototype, a way for me to puzzle out how the various linkages come together to make the rear leg kick and the head lift. But the lovely feedback it received took me by surprise. So, even though it started as a rough working model, I’ve decided to share the parts and construction instructions as a freebie for anyone who fancies having a go.
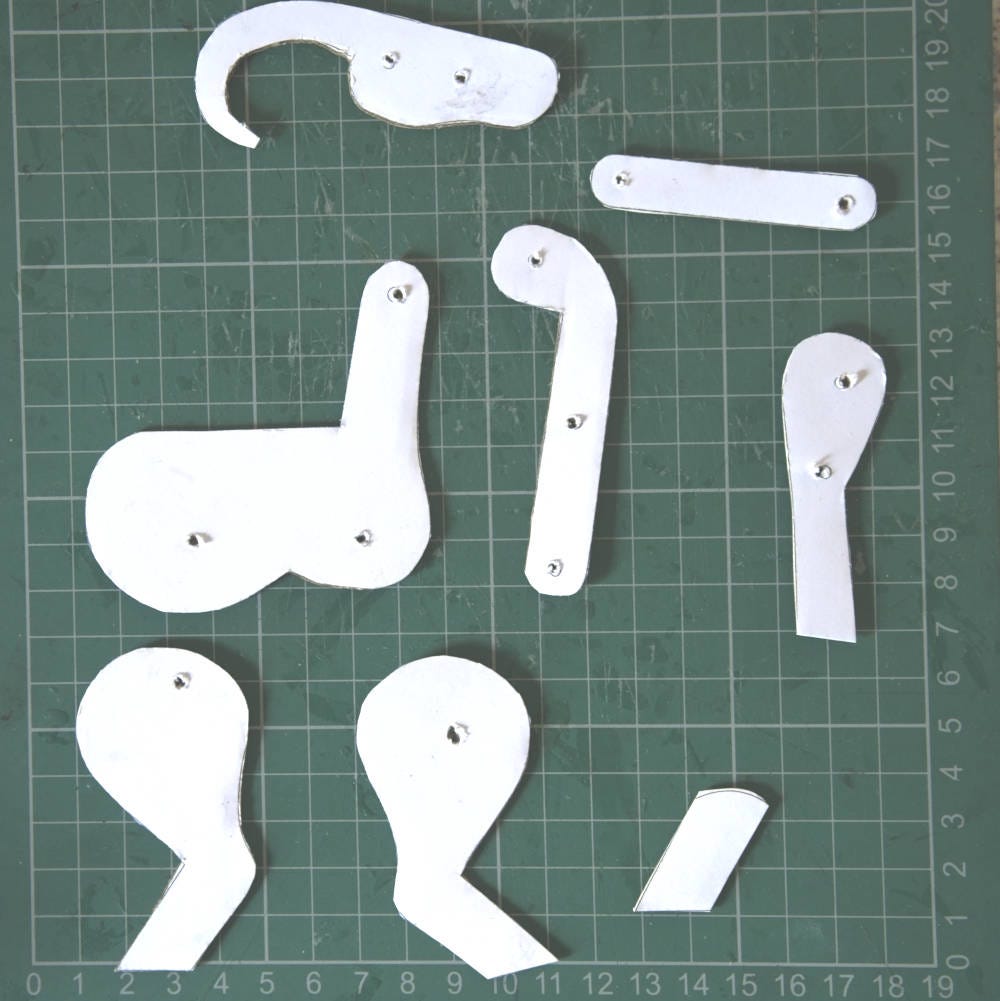
I made the original by sketching the parts straight onto corrugated card, cutting them out, and linking everything together with tiny brass fasteners, I think they’re called brads in the US. I used the smallest I could find, about 4.5 mm × 8 mm, which worked nicely at this scale.
Sharing a design made from corrugated card is a bit of a challenge. In the end, I decided to trace out the parts so they can be printed onto paper. You’ll find the file at the bottom of this newsletter. Print it onto ordinary paper, then glue it to a suitable piece of corrugated card, something like a Pritt Stick works well as it avoids soaking the paper and warping the card. Once done, cut out the pieces and make holes in the card where the small circles are.
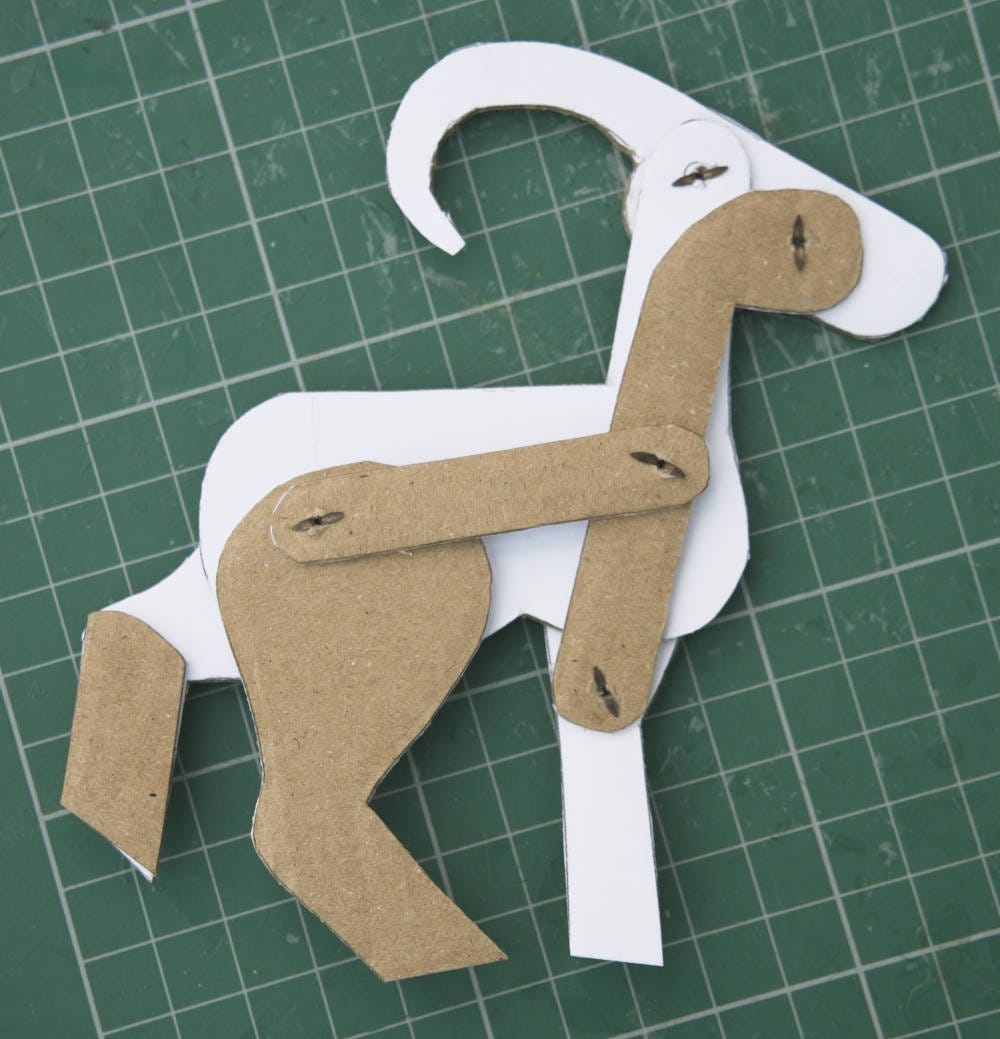
Start with the body piece. Use the split pins to connect the head, front leg and rear leg.
Glue the leg spacer to the end of the rear leg. Connect the leg linkage to the hole in the rear leg back.
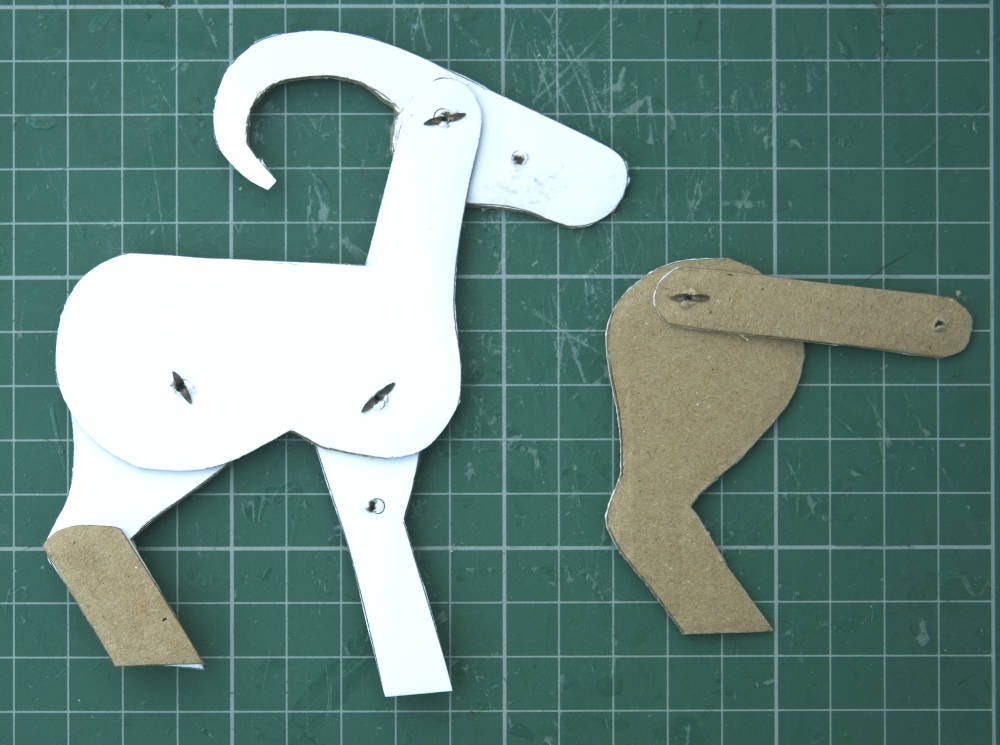
Join the head to the front leg with the head linkage.
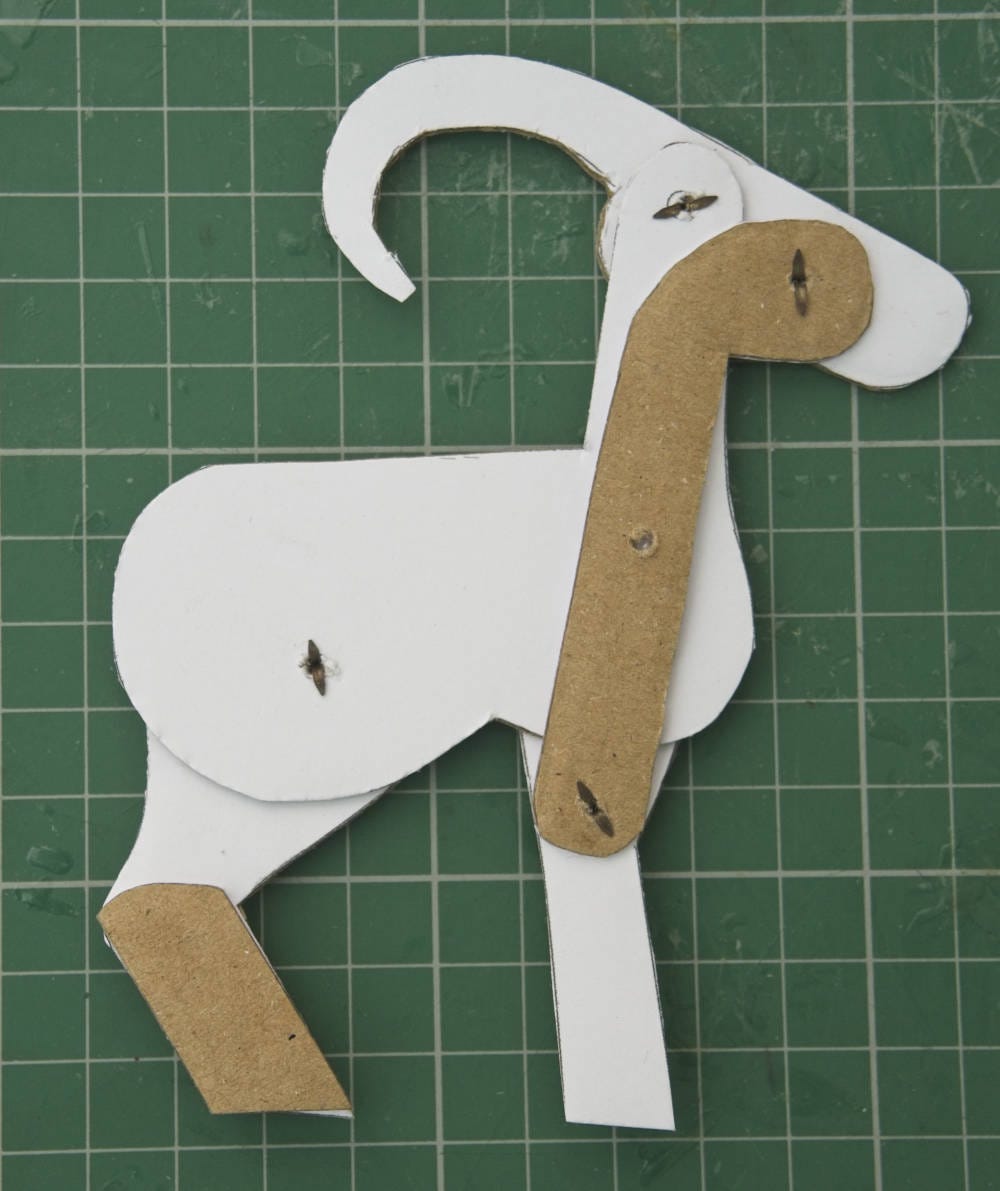
Join the end of the leg linkage to the head linkage.
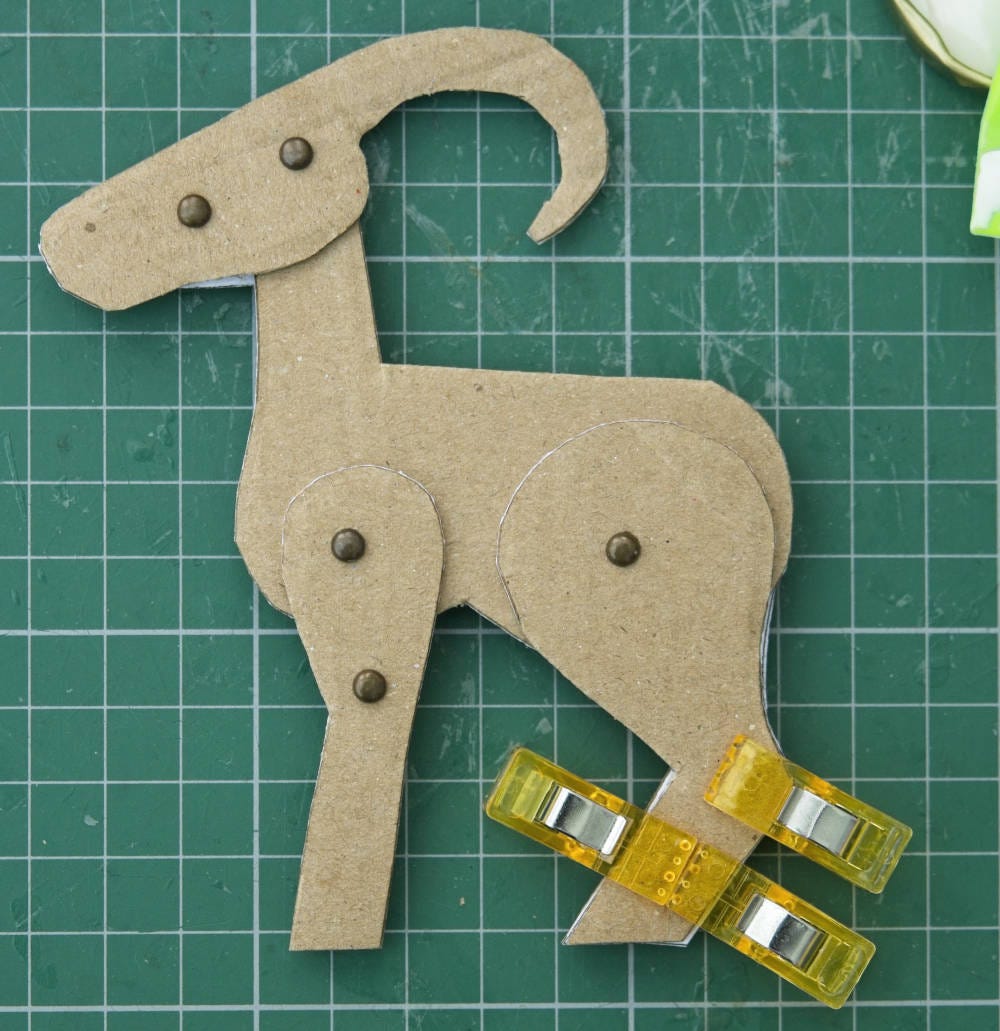
Finally glue the foot end of the rear leg back to the rear leg spacer I used some dress making clips a friend lent me to hold everything together as the glue dried
Keeping the front leg still, lift the body. As you do, the rear leg will kick out and the head will lift, a simple little moment of motion that still makes me smile. I hope you have fun with this quick project. And if you feel like experimenting, why not see if you can adapt the mechanism using different materials or even different characters?
If you’ve enjoyed this build, do take a look at the other automata projects on my website. And if you choose to become an annual premium subscriber to this newsletter, I’ll happily set you up with free membership to the main site, where you can download hundreds of other projects to try at home.
I’ll be back soon with more progress on the full Logic Goat model, it’s shaping up nicely.
Thanks for reading, and happy making!
You can download the pdf of the goat parts here…