
Three Panel Card
An #UrbanMaking Project

What do you do when you’re on a month-long Interrail trip around Italy and suddenly realise you haven’t got your travelling companion a birthday card, for a birthday that’s coming up soon? If you’ve got a few tools, some pens and a bit of glue, you make your own, using materials scavenged from the urban environment around you. At least, that’s what I did. Here’s what I came up with. If you fancy giving it a go, there are instructions on the website. If you’re a premium subscriber to this newsletter, you can download the PDF guide at the bottom of the page
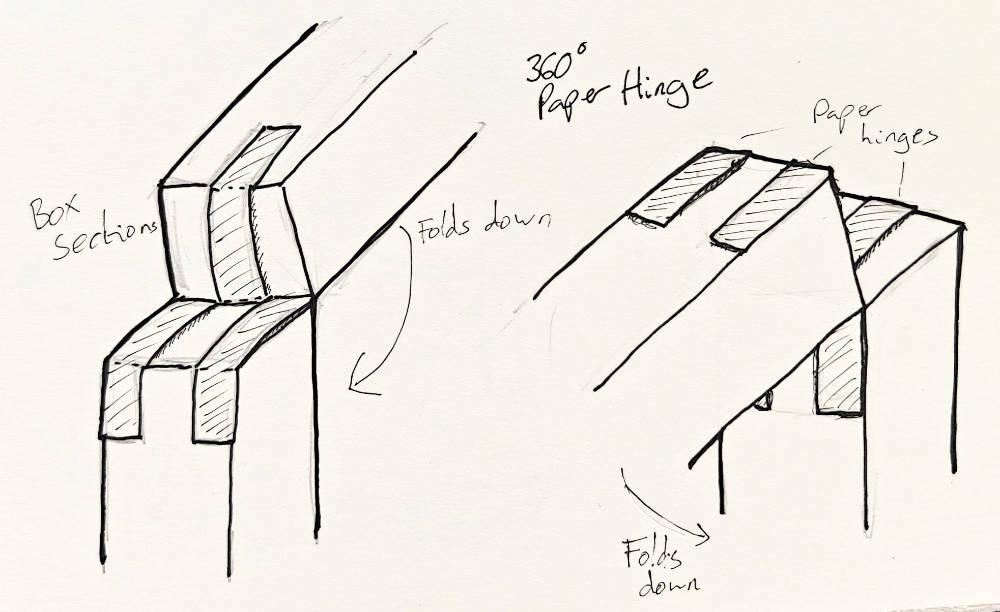
The hinge design for the card is quite an interesting one. Each panel can rotate a full 360 degrees relative to its neighbour, which means the card can be opened and folded completely flat in both directions. The original idea came from some arm mechanisms I built years ago, and I adapted that thinking here. There are three hinge pieces in total, and depending on how the card is folded, either the two outer hinges are active or the central one takes over. It’s a bit tricky to explain in words, but hopefully the sketch below makes it clearer.
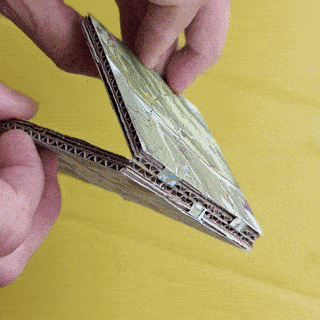
The rather boxy arm sections in the original design are replaced by double-thickness corrugated cardboard in the card project. Luckily, where we are in Italy, shopkeepers stack up their waste card at the end of the day for collection, so there was plenty to choose from. While no one was looking (and without disturbing the pile), I picked out a few choice pieces. I’m pretty sure no one minded! I’d also been handed a couple of city maps from places we’d visited earlier in the trip, so I threw those into the mix aswell.
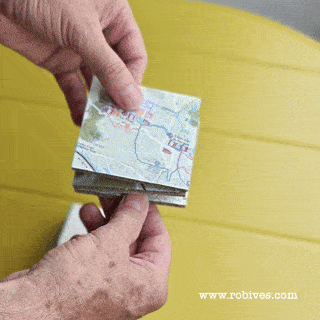
Back in our room, I started experimenting with the hinge design. I settled on a 90mm square format with three panels, though other sizes and panel numbers would definitely work too. It’s a flexible concept. Hopefully in this next clip you’ll get a clearer idea of how the hinge actually functions.
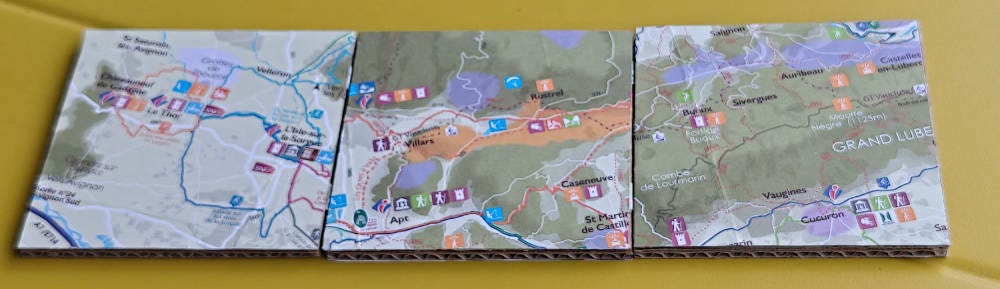
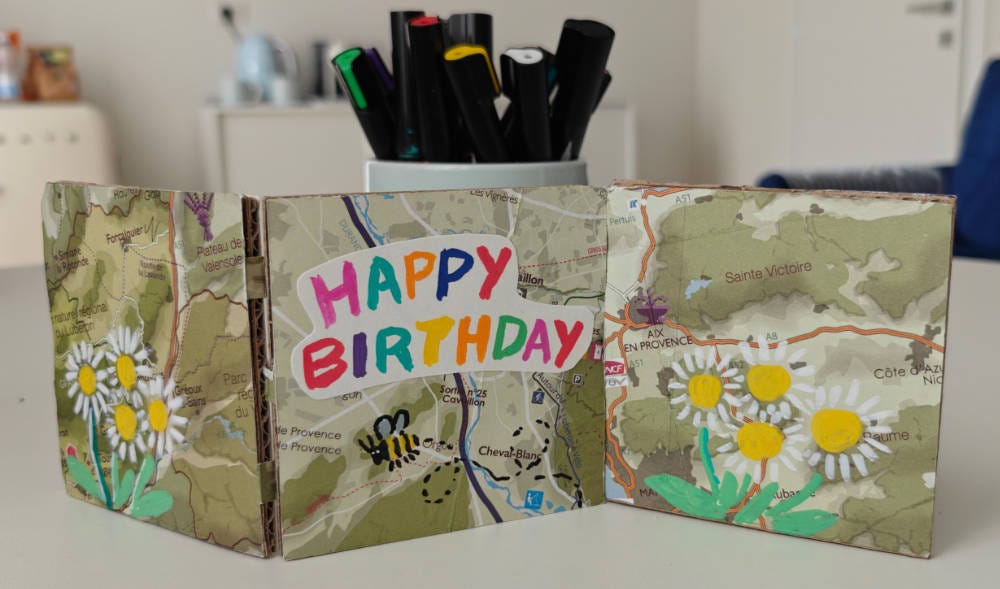
Once I’d settled on the mechanism and assembled the three-panel card, I cut up the tourist maps to cover the six available faces. I deliberately sliced the maps at a slight angle, hoping to create a more abstract feel and disrupt the usual horizontal and vertical grid lines. Once glued into place, the maps add a nice textured backdrop, perfect for drawing on later.
To protect the card and stand in for the usual envelope, I made a sleeve. More recycled material, this time, an empty cereal box. I measured and cut the cardboard, adding a millimetre to each dimension so the card could slide in easily without catching. It’s a snug fit, but not too snug, just enough to keep everything tidy and secure.
Finally I completed the card with a ‘Happy Birthday’ across the centre panel and some decorations. Lucky I had my acrylic pens with me!
I’ve added a personal message on the back to finish it off, and the whole thing folds up neatly, ready to be handed over as a birthday card next week. Phew!
I hope you’ve enjoyed following along with this project. It’s fun to make and surprisingly satisfying. If you’re a premium subscriber to this newsletter, you’ll find the instruction file ready to download at the bottom of the page. Not a subscriber yet? You can still join in by downloading the file for £5 (or the equivalent) from my website here. And if you’re thinking about signing up, now’s a great time, premium subscribers get access to a whole back catalogue of downloadable projects. Opt for annual membership and I’ll also connect you with premium access to my website, where even more projects are available to download for free.
Thanks for reading, and happy making!