
Wild Haggis
A #STEAMjunk Project

It’s Burns Night tomorrow! We’ve been invited round to a friend’s house for neeps, tatties and haggis, along with a few drams and perhaps a touch of poetry appreciation. So what to take as an appropriate gift? Why, a #STEAMjunk Running Haggis, of course. It’s been a fun and satisfying day, ending in this quirky little creation.
It’s late in the day, so rather than posting a full downloadable project I hope you don’t mind if I simply share a few photos and chat about what I made. With any luck, if the mood takes you, there’ll still be enough here for you to follow along.
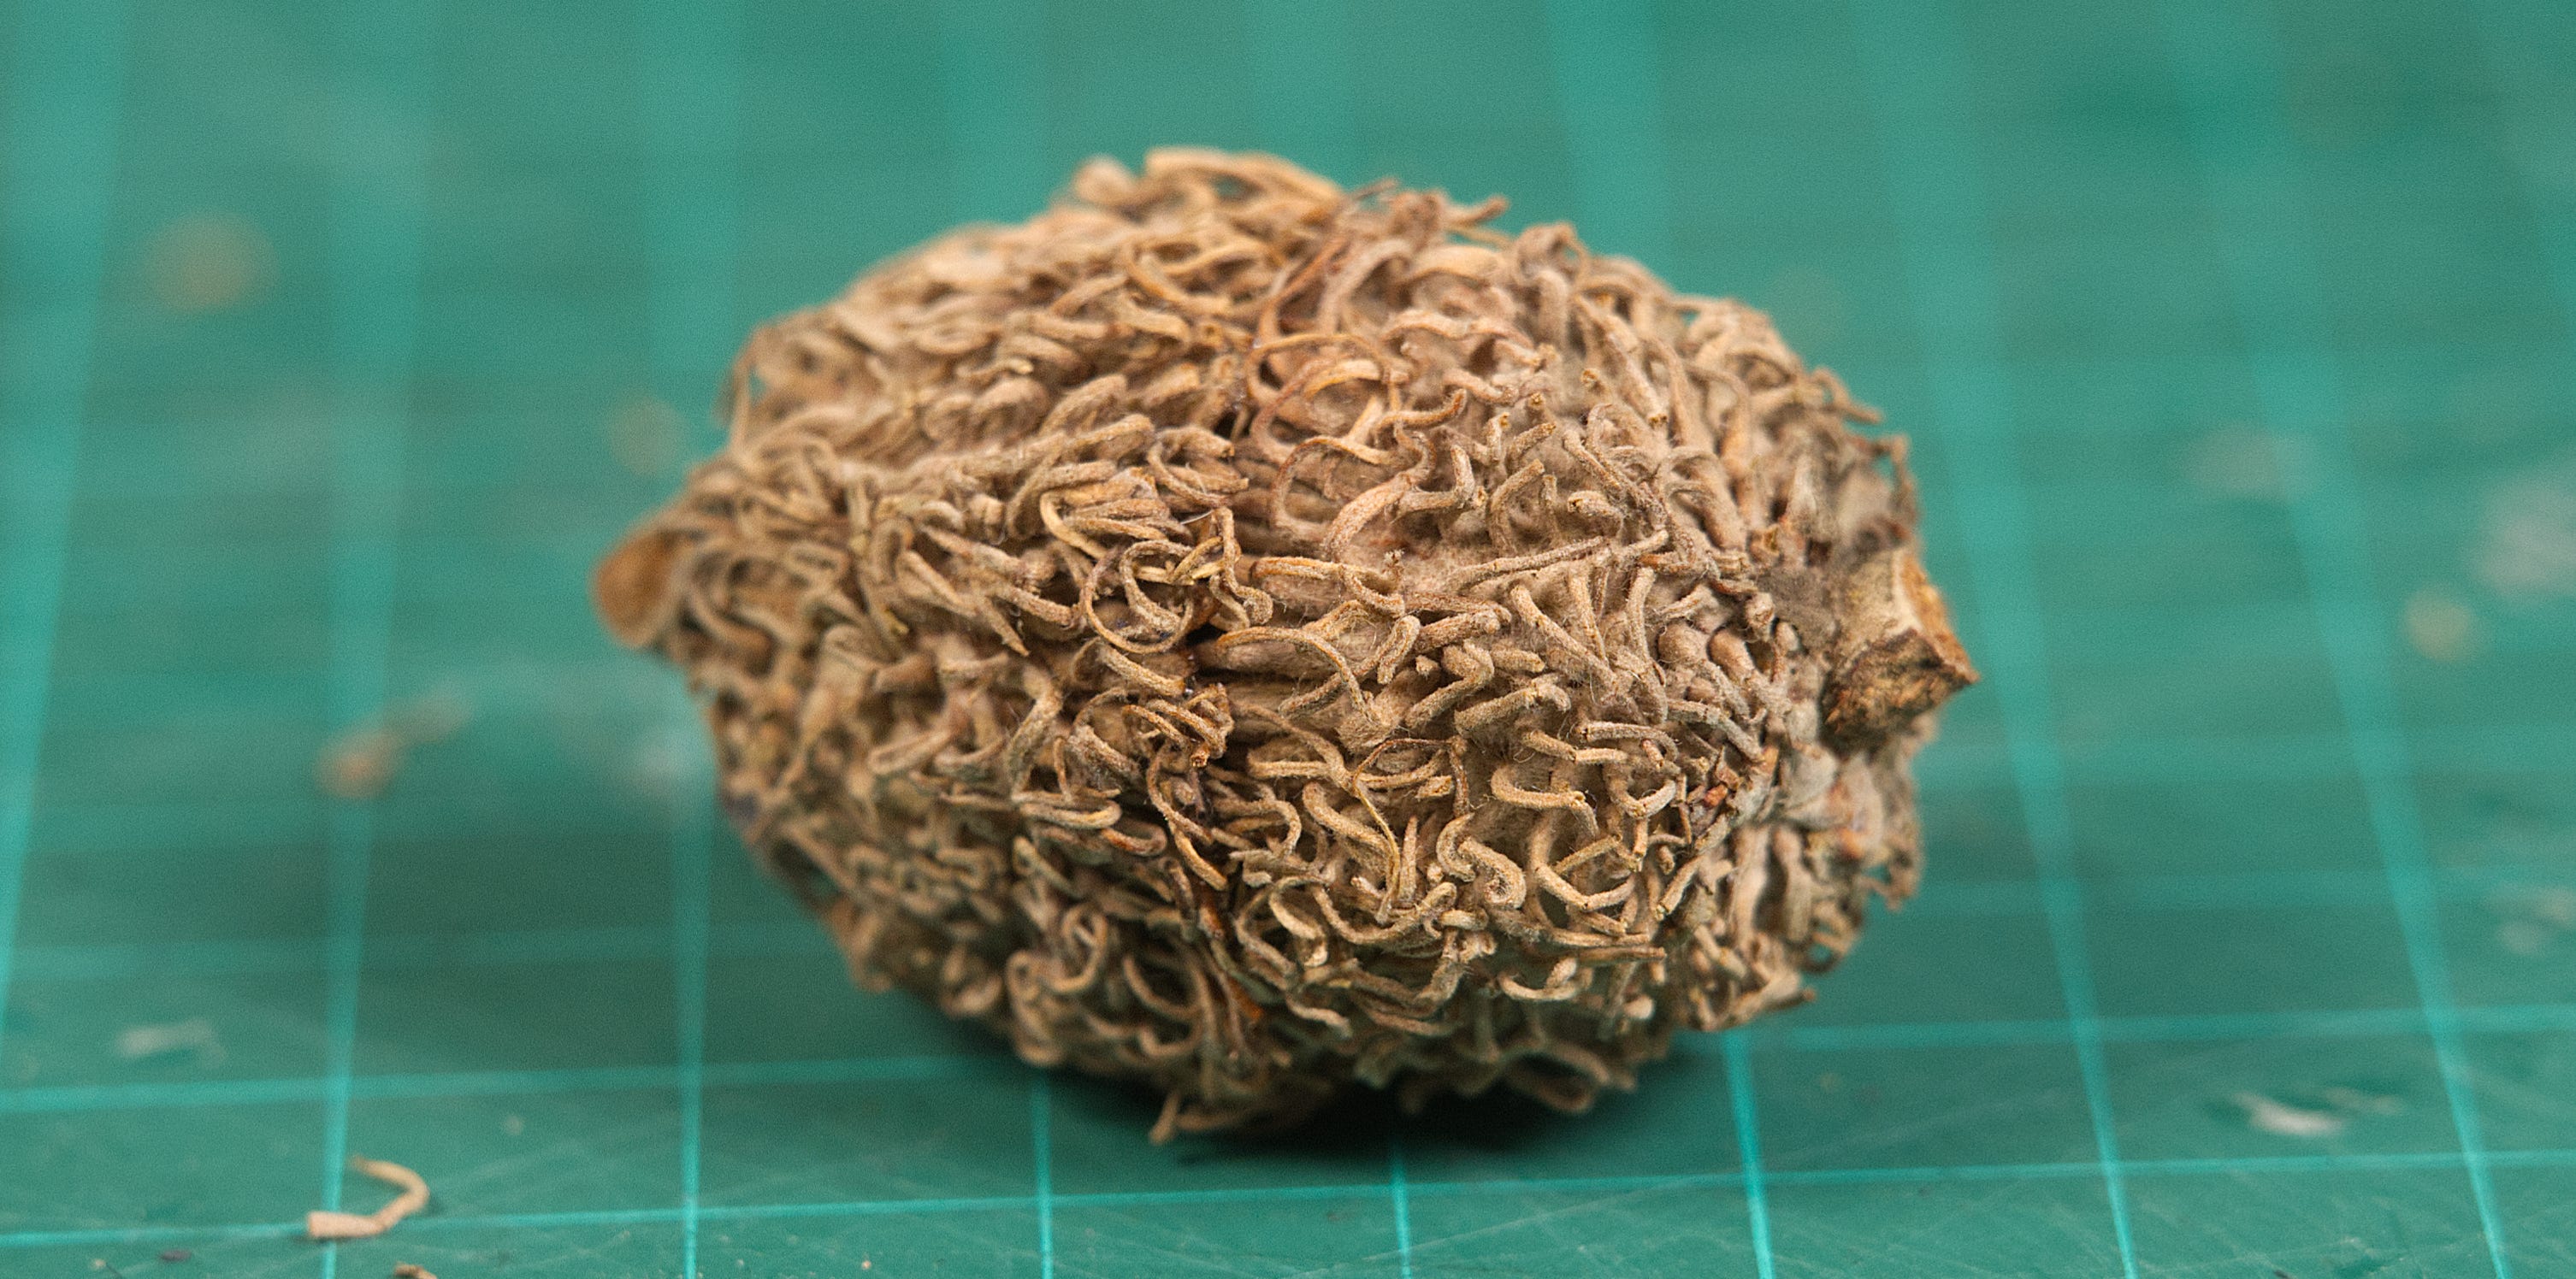
My partner has a delightful habit of collecting all sorts of nature’s detritus, so just before she headed off on a First Aid course this morning she dug out these hairy acorns from one of her boxes of bits.
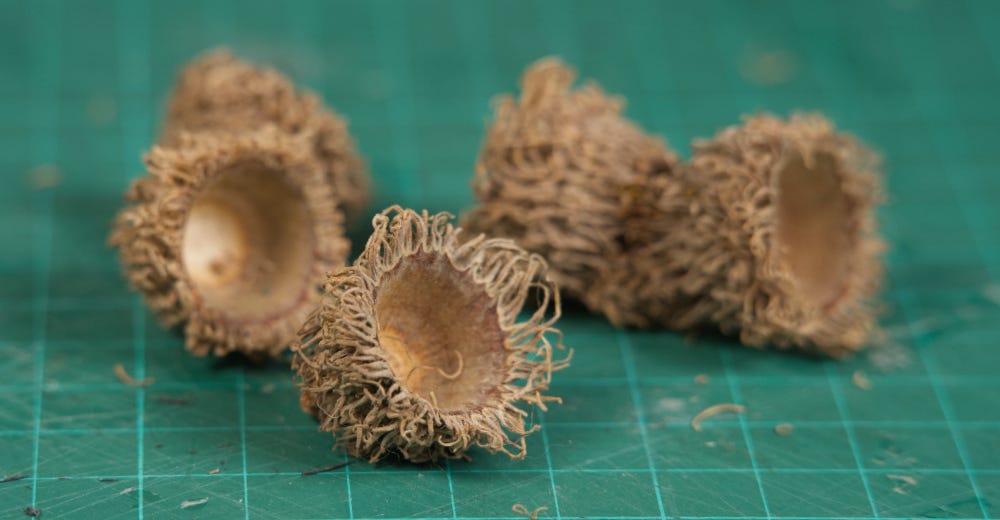
Two of them glued back‑to‑back made a wonderful Running Haggis body. I used a solvent‑based glue rather than my usual PVA, and the result was good and solid.
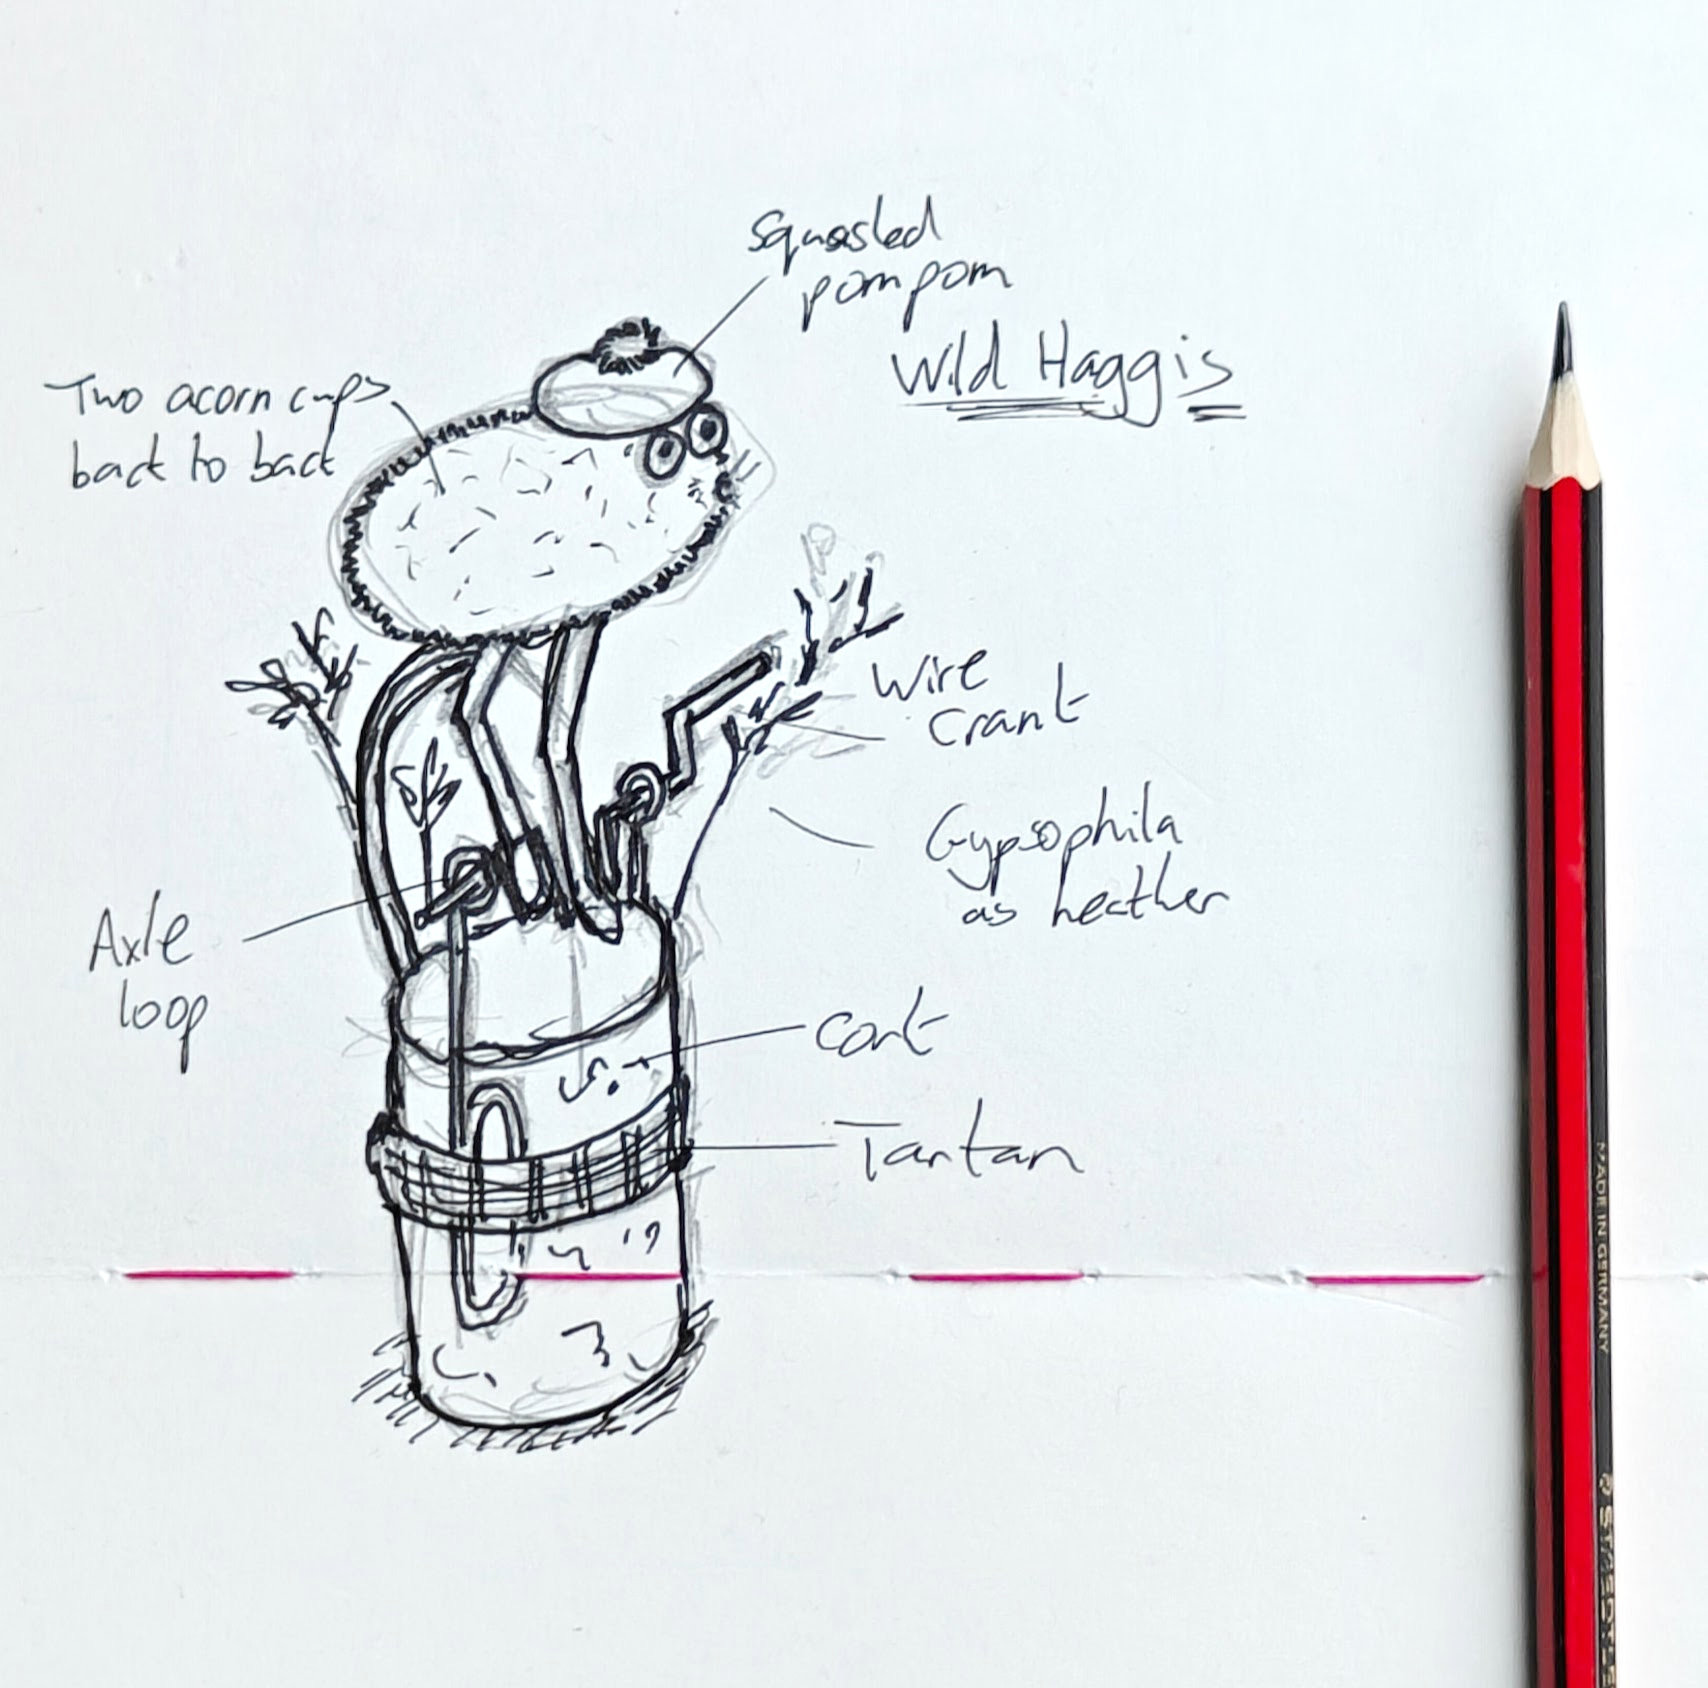
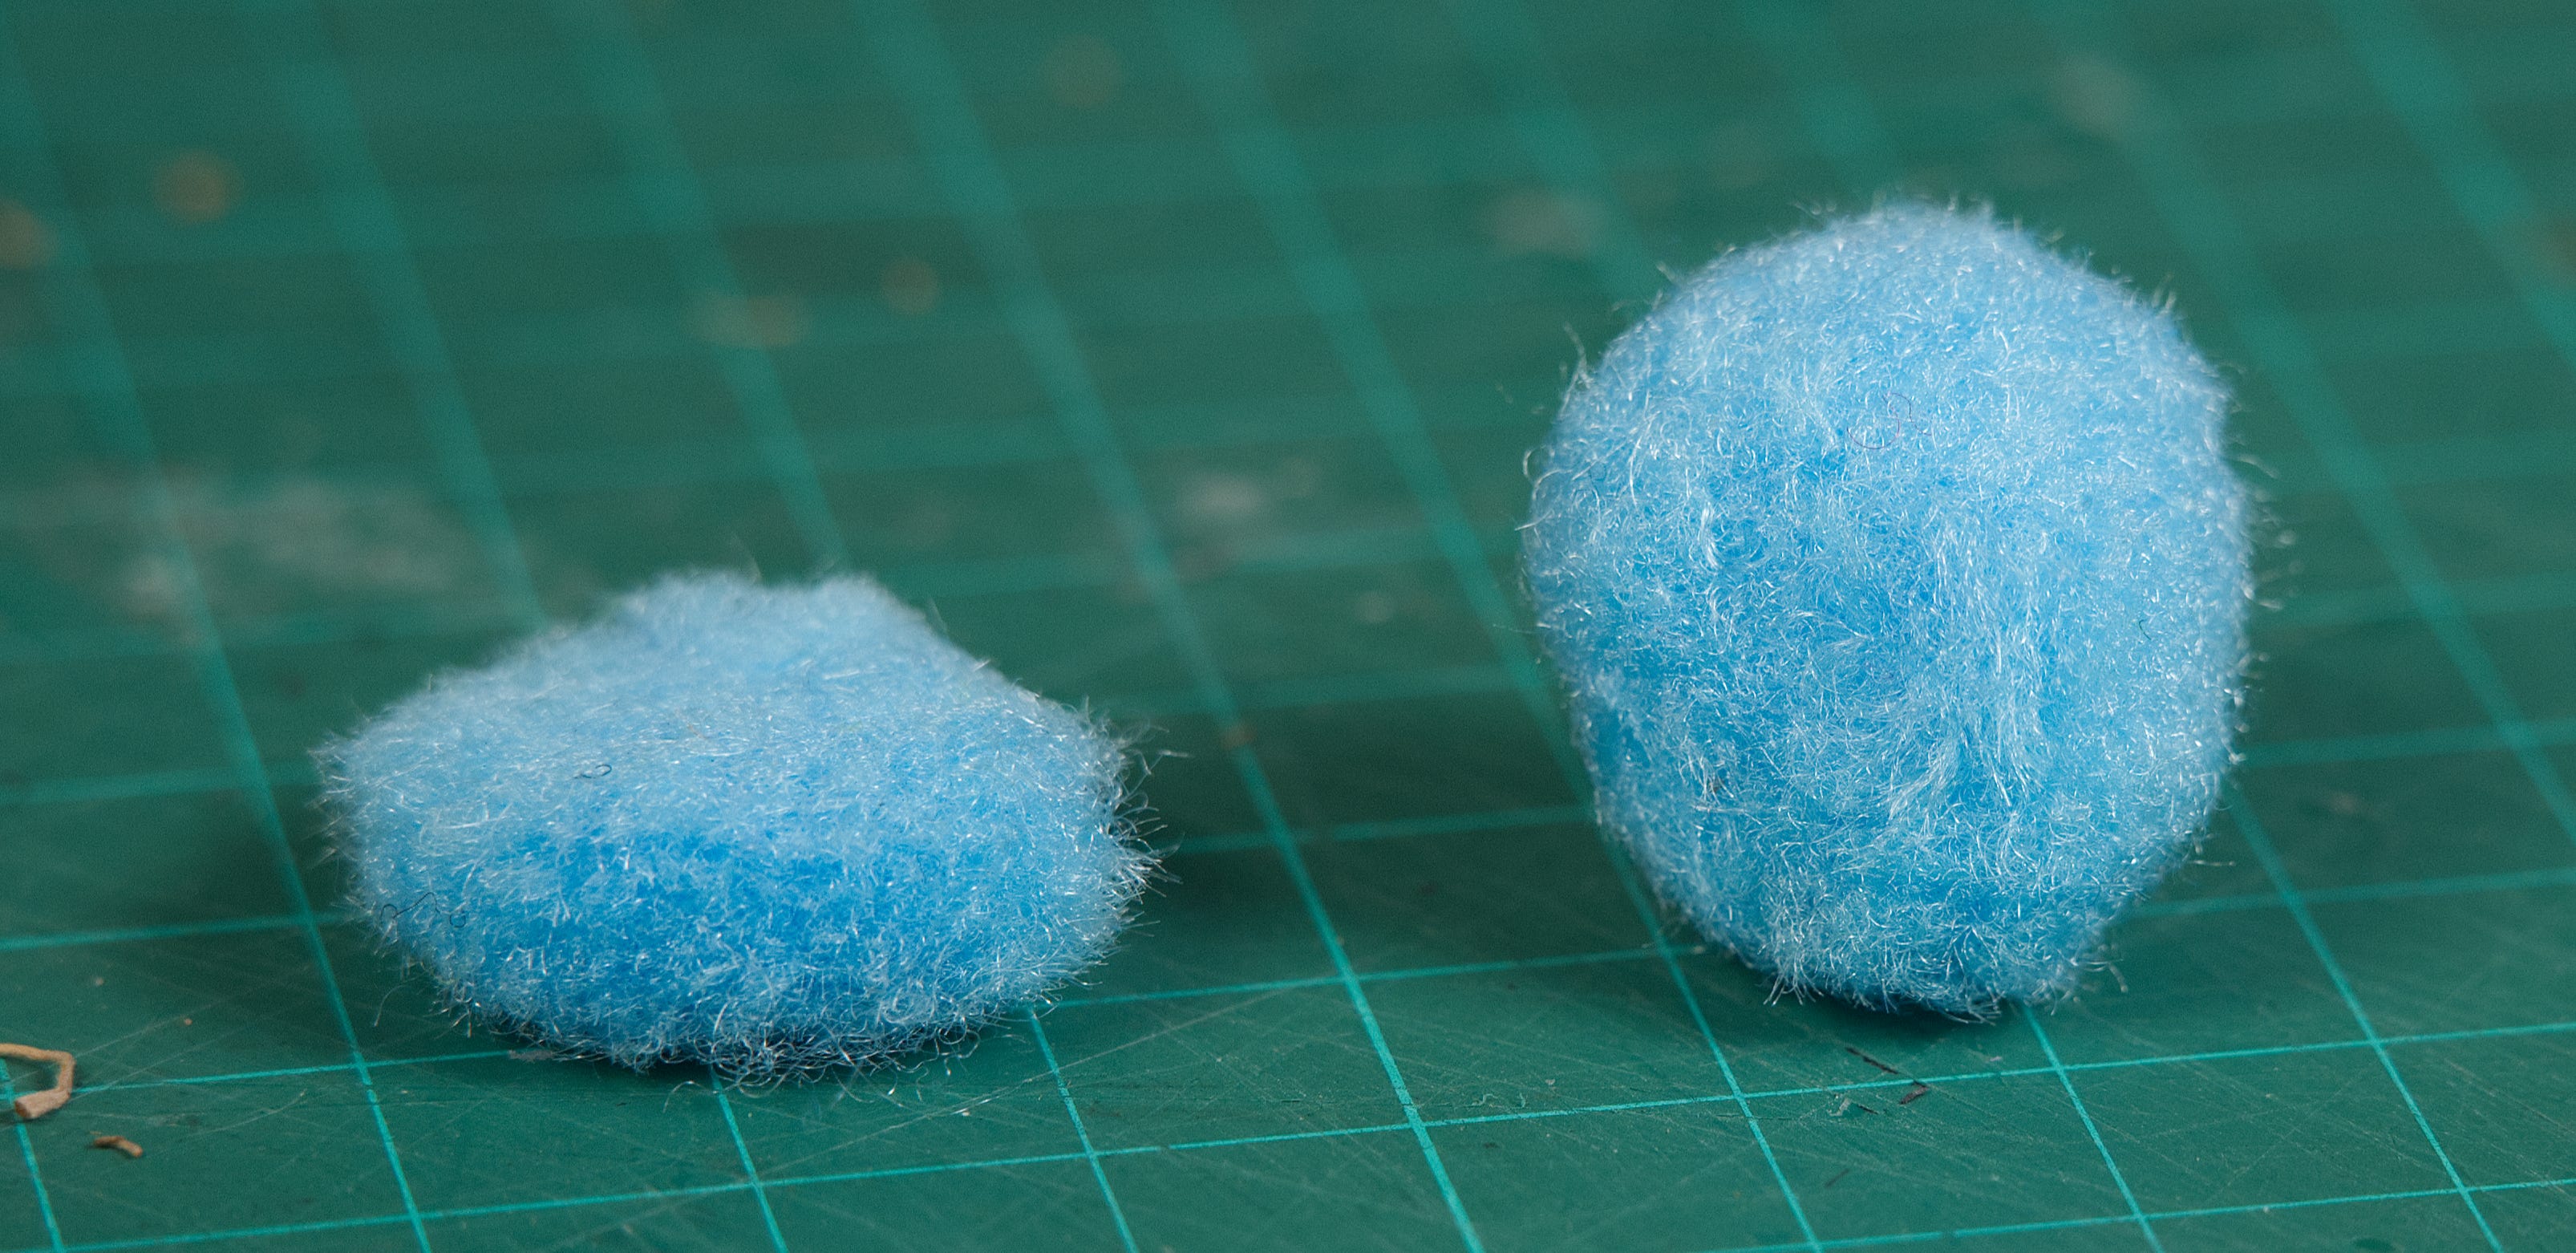
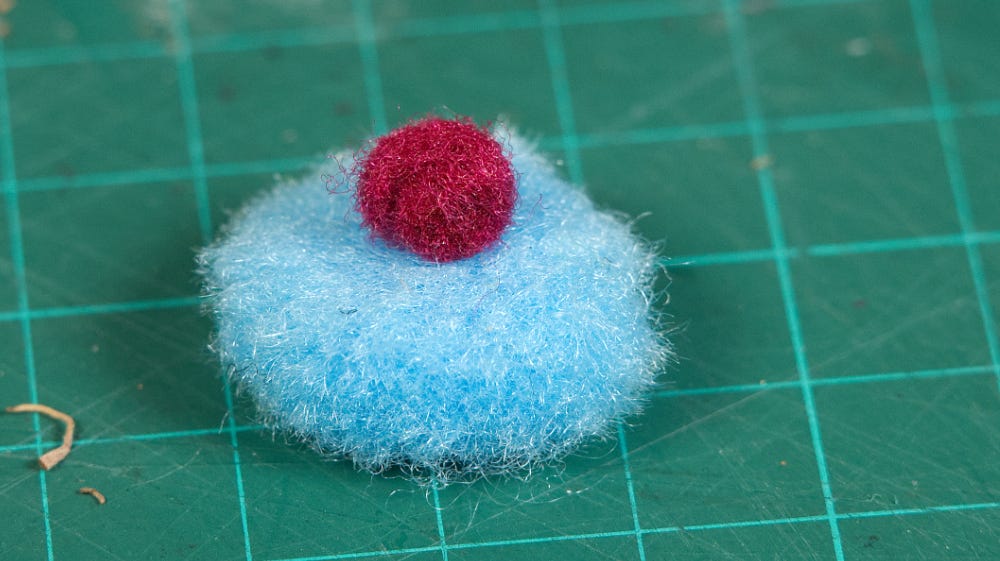
I wasn’t sure about the best way to make the iconic Tam O’Shanter hat, but after a bit of experimenting I found that I could squash down a craft pom‑pom so it took on the shape of a floppy hat
The addition of a tiny pom‑pom finished off the effect nicely.
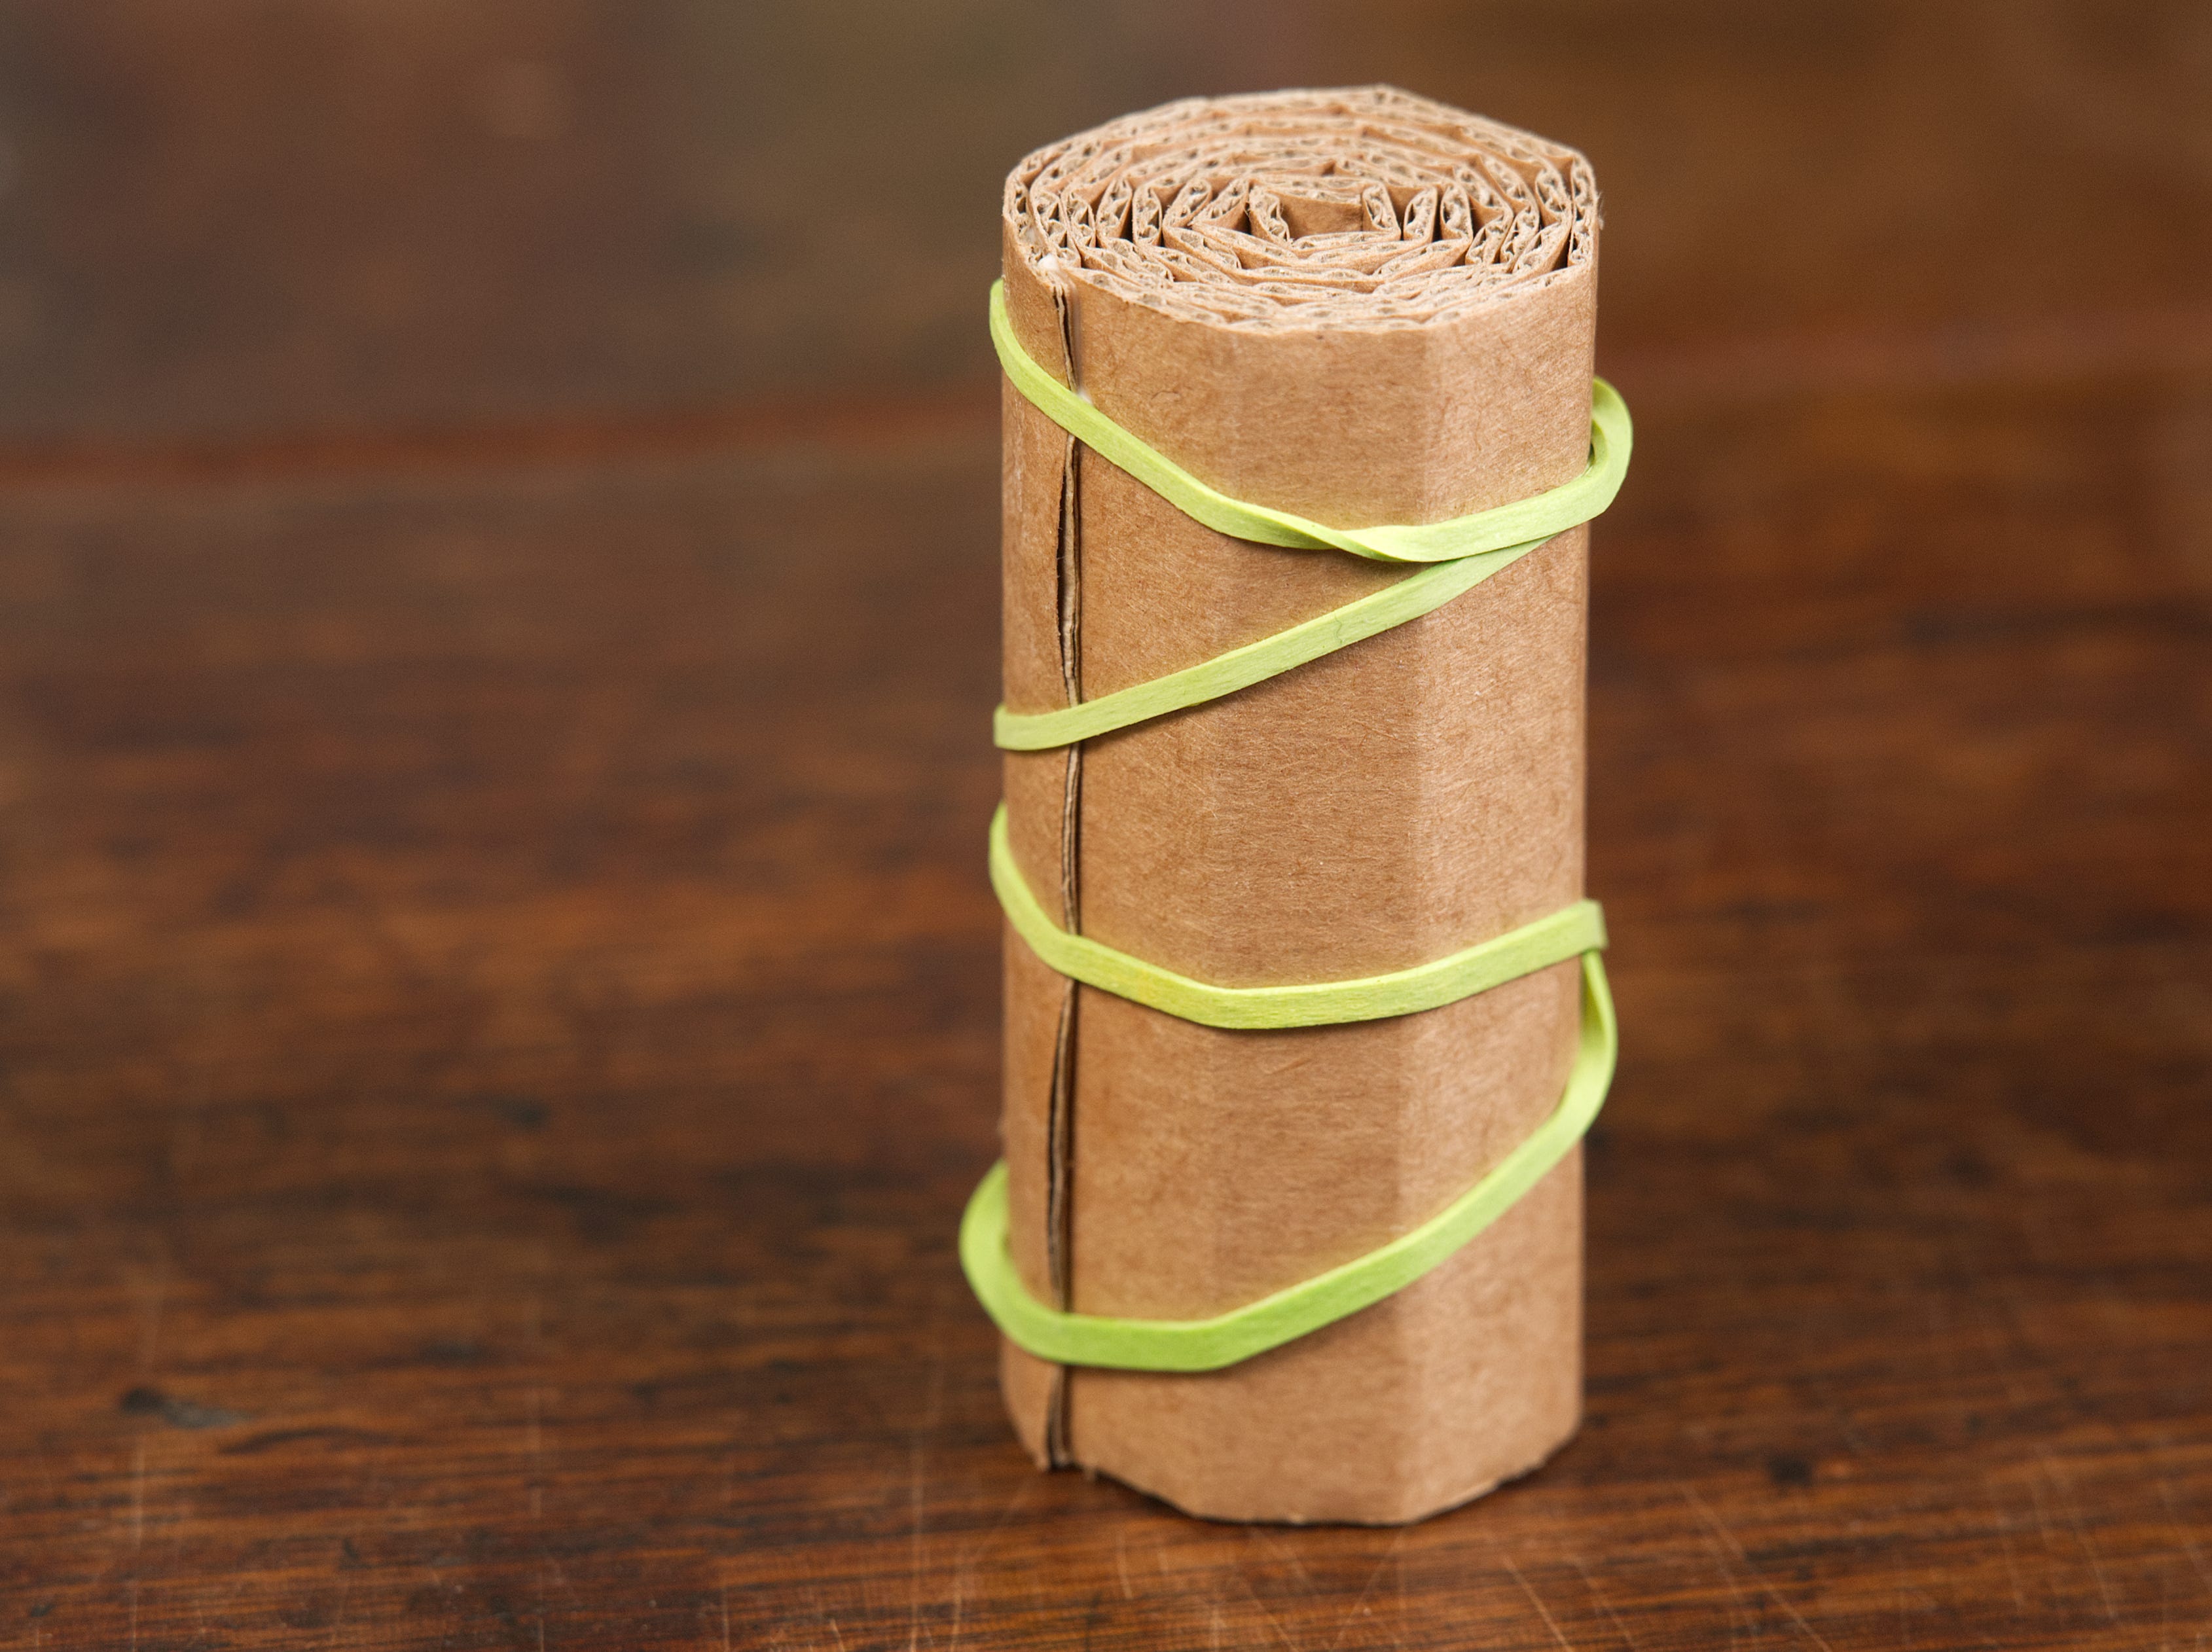
I had originally planned on using a cork base, as you can see in the sketch above, but in the end realised it was probably going to be a little small. I did think about using a small jar, as I have with some other STEAMjunk projects, but eventually opted to try out a new technique. I took a long strip of corrugated card, with the corrugations running at right angles to the length of the strip. I pre‑curled it over the edge of the desk, then rolled it round, glued it up, and wrapped an elastic band around it while it dried. The perfect base!
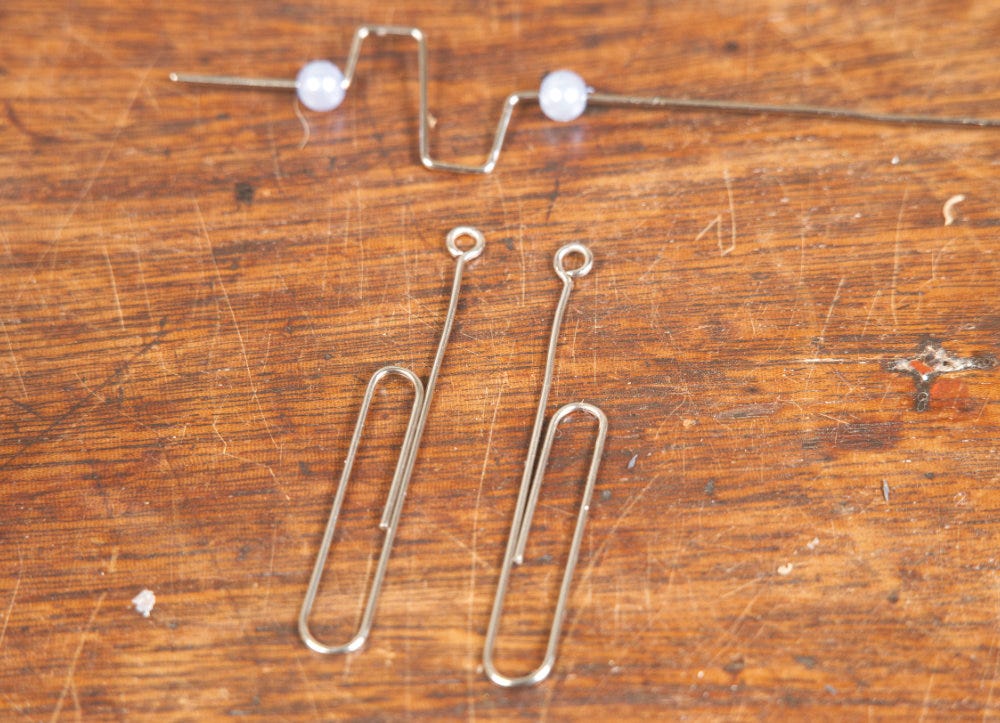
The running mechanism uses a tried‑and‑tested bead‑and‑wire design that I’ve used on previous projects. I straightened out three paper clips, made the double crank from one, and the two axle stands from the other two. The crank was folded so that the width of the crank section was close to the width of the base.
I used a zip tie to hold the axle stands to the side of the base so that the crank mechanism sat just clear of it. I then added a second zip tie at the back of the base; this acted as a springy stand to mount the haggis body in place.
I made a pair of legs and joined them to the body, along with the end of the zip‑tie spring. All these parts were quite tricky to fix together, organic material, paper, and plastic don’t seem to want to cooperate. In the end I used solvent‑based glue. I’d been baking bread, so the oven was still warm. I gently clamped the parts together and put them in the open oven while I made myself a coffee and waited for the glue to dry.
For the final stage I added a third zip tie around the base and tightened everything up.
And to finish off the character, I glued on the Tam O’Shanter hat, added googly eyes, and wrapped a strip of tartan around the base. The sprigs of gypsophila add to the effect of the haggis running wild across the moors. So there it is: the Running Haggis, ready to take round to our friend for Burns Night. I hope they like it, and I do hope you’ve enjoyed following along. Happy Burns Night to you!
Thanks so much for reading and for sharing a little of this impromptu making adventure with me. If you’d like more project rambles, oddball creations, and behind‑the‑bench moments, you’re very welcome to subscribe and come along for the ride. Until next time, I hope your own making endeavours bring you joy, surprises, and the occasional happy accident.
This is soo very wonderful!!! Thank you!
Hilarious!