
Worm Gear
An #Essential Mechanism Project

Back by popular demand, now reimagined as an Essential Mechanism!
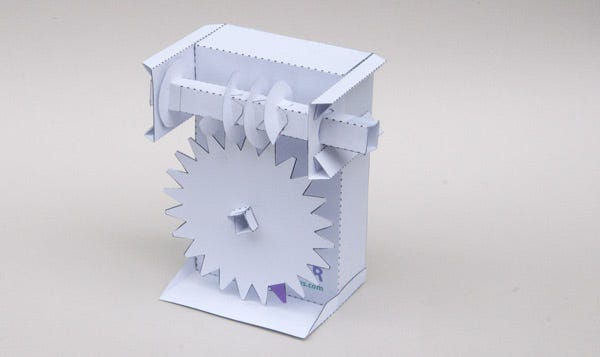
Originally shared some time ago, this updated paper worm gear project makes its official debut on the site with fresh polish and playful potential. Crank the handle to rotate the worm gear and watch the 24-tooth gear advance one satisfying step at a time. Build it as an exercise in pure mechanism, or turn it into a delightfully s-l-o-w character-based automaton that moves with intention.

The project is available as a downloadable PDF, complete with all the components ready to print, along with step-by-step illustrated instructions to guide your build.
Premium subscribers can access the file directly at the foot of this newsletter. If you're not a subscriber, no worries, it's also available for download from my website here.

A bit of project backstory.
My website has been ticking along for quite a few years now and, with over a thousand pages, it's grown into quite the sprawling archive! I do my best to keep things up to date, but every now and then something slips past me.

One such case came from the 'Learn' tab in the menu. A new member got in touch to let me know that a few links in the mechanism section weren’t working properly. Sure enough, I found several broken links and a handful of animations that had quietly retired, Flash, anyone? Those who’ve tangled with it will know the pain.
I’ve started updating links and recreating animations, but it’ll take some time. Thanks so much for your patience as I work through it all.
One project especially stood out: the worm gear. As I revisited it, I spotted a few areas where my approach has improved over time, so I decided to give it a proper refresh.
There were three main areas in the original project that stood out, each one a little time capsule from around 2010.
(I’ve been at this for a long while now, still loving it just as much though!)
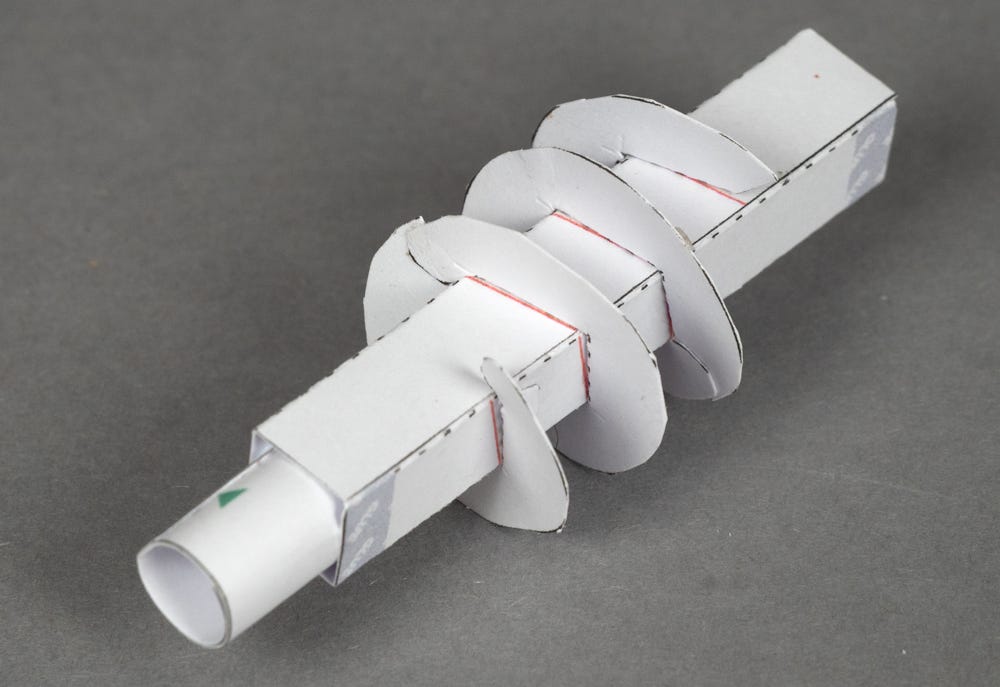
The first thing that caught my eye? The axle.
Back then, I’d used square axles in round holes. Square in round! What was I thinking? It somehow worked well enough at the time, but looking back with today’s experience, it was ripe for improvement.
In the new version, I’ve kept the square axle to mount the worm gear parts, but with a twist. There’s now a circular insert inside the axle tube that slots neatly into the round axle hole. The result? A smoother turn, a tighter fit with less play, and a far more reliable mechanism. It’s a small change with a big impact, and one that makes the whole build feel more refined.
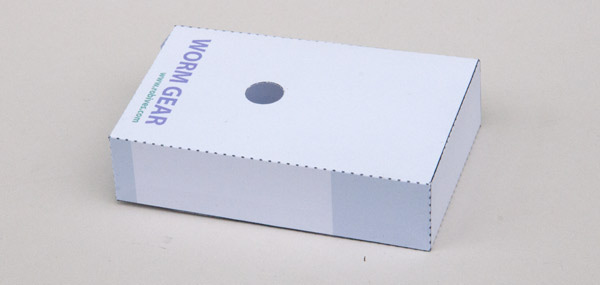
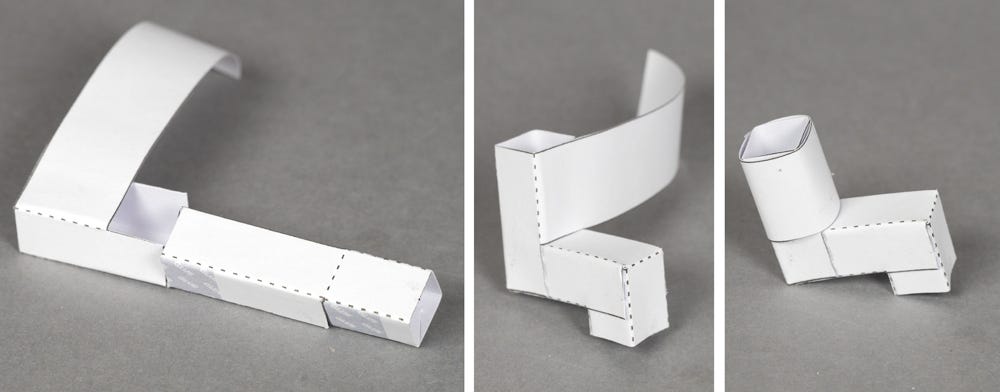
The next update is all about the box.
In the original version, I used a fairly standard six-faced cuboid. It did the job, but once assembled, the interior was sealed off, making any adjustments, tweaks, or curious pokes inside the mechanism a no-go.
In later builds, I moved to a design where the front and back panels are made from flat sheets, reinforced along two edges with right-angled triangular section tubes. These add rigidity without bulk. Two more panels form the top and bottom, while the remaining sides are left open.
The result? A structure that’s both strong and stable, while offering clear access to the inner workings, perfect for checking alignment, making small tweaks, or just admiring the mechanism in motion.

The final improvement is the handle.
Over the years, I’ve gradually refined the way I construct it. In the original version of the worm gear , the handle was made from two folded sections, with a long strip rolled around to form a smooth grip. It worked perfectly well—but I’ve noticed something curious over time: when people build the project themselves, they sometimes attach the handle to the axle in ways that... well, let’s just say, weren’t quite what I had in mind!
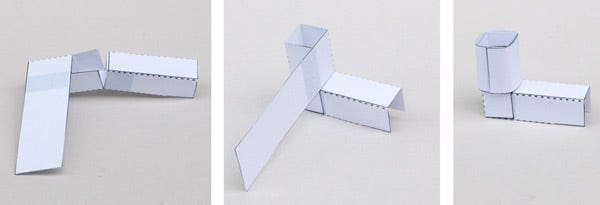
The handle has had its share of refinement over the years.
The latest design is made from three interlocking sections which makes it much harder to fit incorrectly. It’s become such a reliable standard that I usually copy and paste it from previous projects occasionally tweaking the shaft length or, in this case, scaling it from an 8mm to a 10mm tube to fit with the diameter of the worm shaft.
Whether you're revisiting the build or discovering it for the first time, I hope this updated version adds a little extra joy to your making. It’s amazing what a few small changes can do for one-tooth-at-a-time engineering.
I hope you’ve enjoyed this peek into the evolution of the worm gear project, warts, wisdom, and all.
Premium subscribers can download the PDF, including all the parts and step-by-step instructions, at the foot of this page. You’ll also find the file ready to download from the website here
Every turn tells a story—happy building!